June 20, 2012

Mini Break: beach day

The worst part of surfing - the wetsuit struggle


Last weekend the Gunter family came to visit, and we were blessed with a gorgeous beach day. Jamie wanted to try surfing, so Mike took him out for a lesson on my board while Katie and I hung out with Max. It was a welcome reprieve from the kitchen remodel - but toddlers are exhausting!


That pregnant mama can run!

 
The boys sportin' green!


June 10, 2012

JunkFest, Beginning Soldering & Eat Mobile


Susanna came back to town at the end of April for some sister craft time. Despite having several days together, we still managed to jam most of it into one day...


We began at the Plucky Maidens Spring Junk Fest where we cruised every aisle, and I scored some awesome vintage ribbon (above), a milk glass tumbler and a bunch of materials for our next destination: a soldering pendants class at Collage.

Collage is a craft store on Alberta Street that offers classes in all sorts of mediums. I love going into their store to check out all the "doodads" but I only end up buying boring stuff like paper and glue. I'm always tempted to buy the little pieces that are used in 3D collages, but I just know that they would sit on my doodad shelf collecting dust, so I keep my hands folded behind my back while I peruse.

We signed up for Beginning Soldering: Glass Pendants. The class started off a bit bumpy with a very surly instructor, and ended poorly when her timing was off so that we all had to scurry to finish our pieces. However, the middle part was fun! We learned something new, and I know that Susanna can fold this skill into her jewelry making and I can add one more experience to my list. Here's what I learned:

Cards, paper scraps and washi tape


Gather all sorts of fun collage "scraps" and start creating little vignettes that fit your glass tile shapes (we had 1x1, 1.5x1.5, 1x2). Use a tiny bit of glue to attach them to the backside of your glass tile. For the flat glass tiles you'll sandwich the graphics between two layers of glass. For the "bubbly" type of glass pendant, the graphics will go behind one glass tile.


Using copper tape, tape around the sides of your glass tiles.


Use this plastic stick thing to smooth down the tape, being careful not to rip it. After going through the whole process I realized how important this step is. The instructor didn't tell us that any mark or crease in the tape would be visible at the end too.

My Silly Goose

Now it's time to begin soldering. We had to coat the copper tape with flux (that's what the silver solder would stick too). Then we heated up the soldering torches, got our silver ready, and started adding little drops of silver to the tape area, attempting to cover the copper smoothly.


Susanna used a paper punch to cut out bird shapes from the flat copper tape and attached one to each side of her glass pendant.


I had my hands full with just trying to get the solder smooth around the edges, so I didn't attempt any special shapes. 

 The background is black/white washi tape, and the butterfly is paper.


  I made a double-sided small pendant with a sly fox graphic on each side. Since this is a 1x1 pendant, I added a silver jump ring at the top and bottom with the thought that I could suspended a smaller pendant/bead from the bottom.


A Cryin' Lion on one side and a Silly Goose on the other.
  

 This is the bubble pendant, so the graphic is only one sided. A sheet of copper went on the back and that was soldered too.


One of the class participants makes dichroic glass, so she brought in a few pieces for us all to use. I chose two pieces and made them into earrings.


We finished our day by meeting up with Mike and heading down to the Portland Eat Mobile Food Cart Festival, this year held in an OMSI parking lot. At this point we were tired and hungry, and when we arrived we were greeted with a line stretching for BLOCKS! Susanna and Mike got in line while I trekked up to the front to figure what the hell the line was for.  I almost turned back when I saw how long it was, but logic took over and I kept moving ahead - glad I did. I have no IDEA what the line was for, but since we had our tickets we could just walk in. The place was jammed - far more crowded than last year. So naturally the lines were long too. Most moved pretty fast, but some of the carts weren't well prepared so their food wasn't flowing fast.

Our favorites were the waffles and the icecream (lots more icecream carts than last year).  We left with plenty of food in our stomaches, but not $18/person worth. Since it was a fundraiser for MercyCorp, I figured that we made a nice donation and left it at that. And since none of us does well with crowds, waiting or disorganization, I don't think we'll return next year.

this sums it up

June 3, 2012

House Projects: work in progress


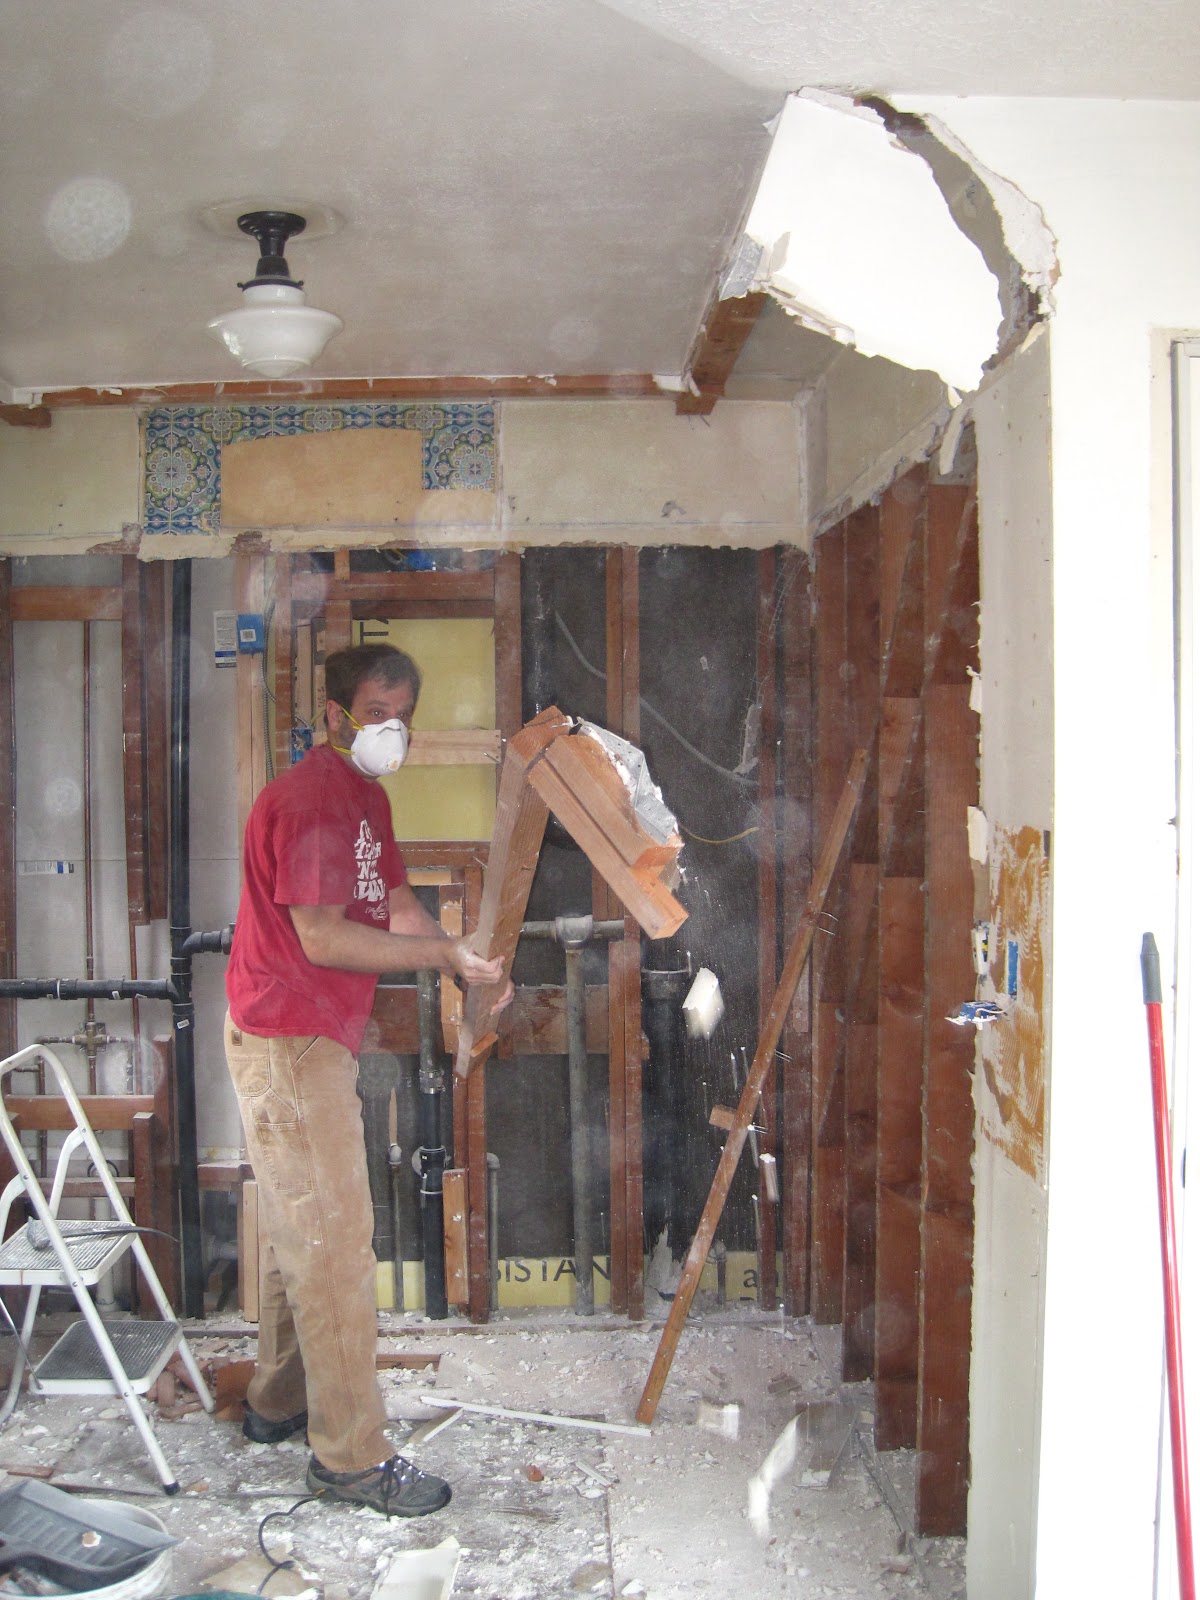
Kitchen demo continues...


With each wall we rip out, we're confronted by one more weird 80's retrofit.


So far we've taken out drywall, and under that plaster, and under that lathe, and under that old insulation. Next we have to redo the electrical and a little bit of plumbing, add insulation, then the drywallers will come in and close up the walls.


For the floors, we've chipped out tile and pulled up cement board. Next we'll rip out linoleum and cut out melamine. That's all to expose the sub-floor, onto which we intend to place some hardwood oak flooring.  So much more to go but I'm so glad this project is underway - after 7 years I'm ready to have a finished kitchen!

May 29, 2012

Baby Sweaters for Freya


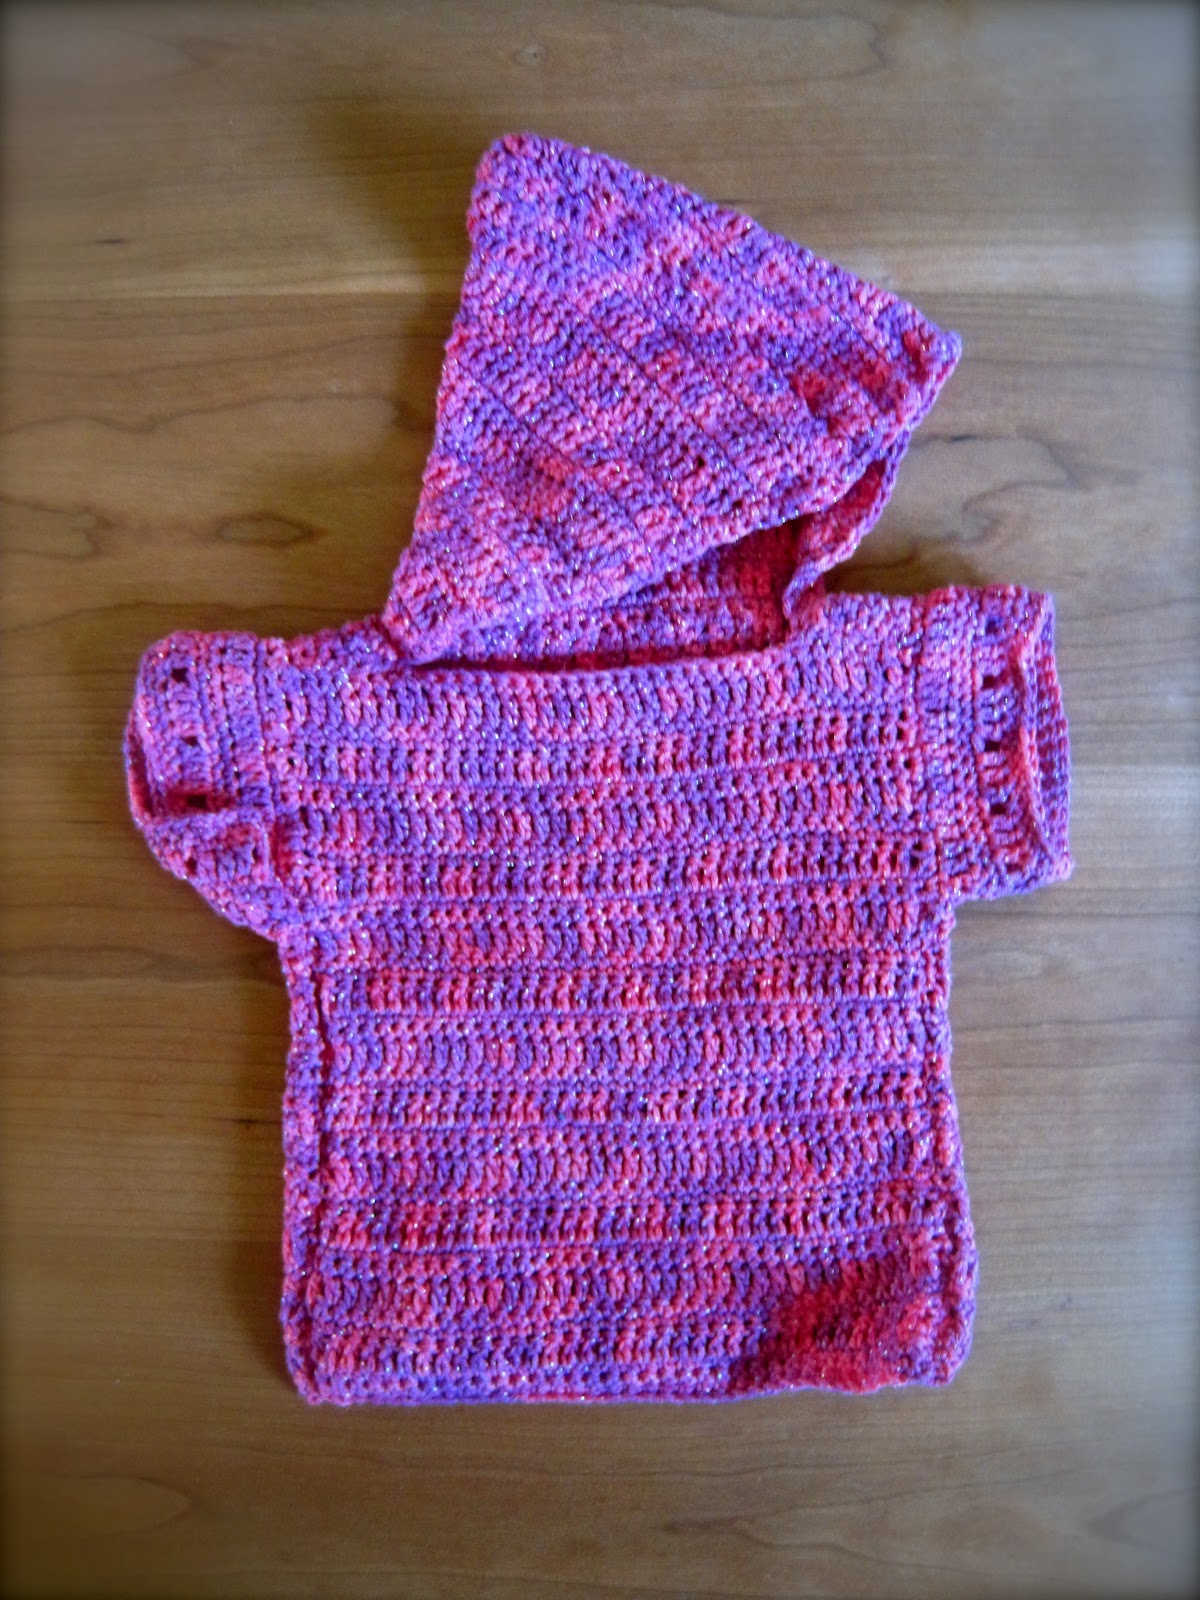
When Susanna visited in April she took the train and therefore had 6 hours of crocheting time - she made good use of her time.

Yarn has a little bit of sparkle in it

She whipped up this pink & purple hooded sweater for our niece Freya, as well as a cap and headband with the leftover yarn (not to be worn together as that would be too matchy-matchy).


In addition she created a second sweater out of a beautiful variegated yarn.


She was afraid it might be too small, so she added the vertical rows and this awesome button closure.


Lastly she crocheted a little cap with an accent button - I wish this was in my size (note to Susanna regarding a future Christmas present).


I wish I had made these - they're so gorgeous. Freya agrees!


May 20, 2012

Barbapapa Mobile


Do you know the Barbapapa Family?

It's a French cartoon family, where each member changes shape to become whatever is needed in the situation. They are a peaceful and friendly family of seven; colorful and blob-like. My toddler friend, Lilly, introduced me to the cartoon dubbed in German (her mother's native language). Since Lilly just became a big sister, I made a Barbapapa mobile to introduce baby Dylan to his sister's obsession.


Imagine, if you will, that five members of the family decide to take flight among the clouds, becoming a balloon, airplane, bird, kite and butterfly.


Barbabright, the high-flying kite

Barbapapa, the big Balloon


Barbazoo the Bird and Barbalala the Butterfly

Barbabelle, the Aeroplane

Fluffy felt clouds under the rainbow ribbon

Each of the Barbapapas is needle felted from wool roving, while the clouds are handsewn flat felt around a ring.

May 16, 2012

Amy Butler Long Top


After sewing up two BurdaStyle Anda dresses, I decided to try my hand at sewing a top. With summer close at hand, I chose the Amy Butler pattern "Mini Dress Tunic & Tops" - opting for the top in the "long length".

Unlike the BurdaStyle pattern, this one was very well written! Amy did an excellent job with clear and concise instructions, and I definitely needed it. This was my first experience with an invisible zipper (turned out to be easier than regular zippers) and my first time using a lining (it's at the bodice only).


I chose a cotton fabric from Fabric Depot; light gray with a subtle white hatch pattern (I can't ever remember the pattern designers, but this same fabric came in lots of color combos). Believe it or not, I actually ironed this top before I photographed it, and it doesn't seem to have made a difference. I might think twice before using this fabric again for apparel.

After wearing it a couple of times I have a few observations:

1) It's difficult to zip/unzip by myself. This might just be a result of the type of zipper used, but it's an annoying feature.

2) The shoulder seams have a little pleat feature on the front and back that was very hard to match up. It's a small detail, and not very noticeable when I have it on (not noticeable at all if my hair is down), so I will probably leave this feature out if I do it again.

3) The overall shape of the top is very forgiving - maybe a little too forgiving. I fear that it looks like a maternity top because the front pleat just flops open and I can't see my toes. I actually thought about tacking the pleat down, but I haven't decided if that's a good move or not. Perhaps if I used a lighter-weight fabric then it would "flow" more and I wouldn't feel like I was wearing a bell. If I make this again I think I'll make the "short top" length to see if that makes a difference. Or I might try the dress length, as it appears that the bodice is longer and the result is more empire-waisted.


May 12, 2012

House Projects: works in progress

Since Spring has arrived and we've been blessed with some nice/dry weather, Mike and I have begun to tackle our long list of summer house projects:


The front garden beds are slowly filling in with plants (cat mint can grow!) and we've sunk 5 posts for our wire grid fence.


The front porch that was redone last Fall was redone again (a long story to relate in a future full post). Now we need to paint it and finish the front overhang.


And finally, we've begun the kitchen remodel! This one is a total "gut" job... a couple months of microwave dinners are in our future...

May 9, 2012

Dotted Baby Kimono


 Here's another baby kimono, just like the one I made for my niece Freya at Christmas.


This one accompanied the pacifier clip and minky "lovie" that I made for my friend's baby girl, Avery, born last month. I wanted to make a lighter-weight kimono since this is a spring baby, but then I remembered that the pattern is oversized, and I figured that by the time it fits her Fall will be rolling around. So this one is a medium weight cotton lined with flannel. I love the dots paired with the coral! I used the same fabric to make a boxy pouch and a passport cover for christmas presents, and I still have a tiny bit leftover. I'll have to get my hands on some more, as there are several baby boys popping up in my life right now, and I think this fabric would work well for them - yay for gender neutral polka dots!


May 6, 2012

Burda Anda Dress #2


Burda Anda dress #2: This time using a solid, lighter-weight fabric than the one I used for Anda dress #1.  As you can see I also made a few other changes.


I put the elastic casing on the outside of the dress, and made it extra wide so that I could sew down the middle, thereby creating two "tubes". I used 1/4" elastic in both tubes.


I decided to create a scoop neck with this dress instead of the boatneck of the original pattern, but for some reason, the top part of the dress then looked really, really wide. To fix it I embarked upon my first adventure with elastic thread, and sewed up the shoulder seams and at the bodice to pull the fabric in. I also added in-seam pockets in the same color fabric.


Same pattern, two different dress styles. I'd like to make a third dress in a heavier fabric, perhaps gray, that I can wear this fall. For now, I'll focus on making some more summery clothes, as I'm sure that the sun will come out any day now.
Related Posts Plugin for WordPress, Blogger...